This is the procedure for setting up a new GMail account to use for the BACHA Combined Coffeehouse Calendar. The venue must not use an existing account and must not use this account for email or any other purposes other than entering their shows into the combined calendar.
Before you begin, it would be a good idea to familiarize yourself with the Rules for the BACHA Calendar Accounts.
Before you begin, you will need the following:
A text file which will contain the account information for this venue. You can make a copy of the Blank-BACHA-AccountInfo.txt file, change “Blank” to the venue name, and put the account information into that file.
A 6 character user name. It cannot be more than 6 characters and it has to be a unique name that someone hasn’t already picked. A good choice would be a joining of the street number of the venue along with a few characters from the venue’s name, for example: CF26CS@gmail.com. They won’t be using this account for email so don’t worry about having a user name that makes sense. In fact having a user name that does not reflect the name of the venue will discourage them from using this account for email.
A secure password. See this page for the definition of a strong password (ignore the last 3 bullet items). You can use an automatic password generator (like the PW Gen add-on for Firefox) or come up with one on your own. The password does not have to be easy to remember because the venue will have the text file with their user name and password in it. They can just look it up when they need it.
The birthday of the person who will use this account. Google requires this in order to create an account. I think that they want to verify that the user 18 or over. They probably also use it to target advertising to specific age groups. If you don’t have the birthday, just make one up, but be sure to record it into the text file.
The email address of a person who will use this account. This is for password recovery purposes.
The phone number (or cell phone number) of a person who will use this account. This is also for password recovery purposes.
Step 1
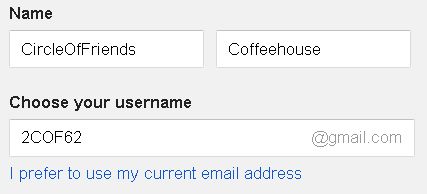
Go to this page and fill in the fields to create the GMail account. Make sure you enter the venue name, not your name, in the Name fields. Do NOT choose “I prefer to use my current email address”.

For technical reasons, you have to create a GMail account, not a Google account. The GMail account names are shorter and take up less characters in the Combined Calendar specification. Although the page title says “Create a Google Account”, this same page can also be used to create a GMail account. If you “Choose the username” as ______@gmail.com, then it will set up a Gmail account. If you click on “I prefer to use my current email address”, then it will set up a Google account.
NOTE: If there is a captcha test toward the bottom of the page. Make sure you can read the text before you proceed. If you can’t read it, hit the reload button below the text to get a new captcha challenge.
NOTE: There are fields to enter in the first and last name. You could concatenate the name of the venue into one word (for example CircleOfFriends) and use that for the first name. Then use Coffeehouse for the last name. Don’t worry. You can change the name that shows up in the calendar later on.
NOTE: Once you create an account, it will ask you for a phone number that it can use to send you a text or voice verification code. If you choose voice, rather than text, then you might want to have a pencil and paper handy so that you can write down the verification code.
NOTE: Google keeps changing the layout of their pages so the following information might not be entirely accurate. If you spot a change, then these instructions should be corrected. Contact the BACHA webmaster to make the corrections.
Step 2
You can skip “Getting Started” button and the part about setting up a Gmail account. Just click on the Google Apps Button (to the left of the bell icon) and click on Calendar.

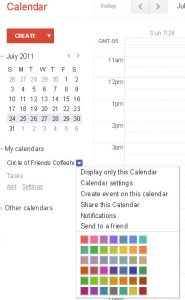
Press the arrow to the left of “My Calendars” on the left side of the page to find your new calendar. Click the menu button to the right of your calendar and choose “Display only this Calendar”.
Step 3
Click the menu button again and choose “Calendar settings”. Click the “Edit notifications” link on the top of the page. Click off all the check boxes for “Choose how you would like to be kept up-to-date”. Click the “remove” link to the right of “Event notifications” and then click the Save button.
Step 4
Click the menu button again and choose “Calendar settings”.
Now click on “Share this calendar” at the top of the page.
Click on “Make this calendar public” and then click the “Save” button.
Click the “Yes” button when you get a warning message.
Step 5
Click the menu button again and choose “Calendar settings”.
Select the venue code (starting with src=) and copy that into the bottom section of the text file. You will need that code later on to add the venue to the BACHA combined calendar. Don’t forget the “&” character. The venue code for Circle of Friends, for example, looks like this:
src=cof262%40gmail.com&
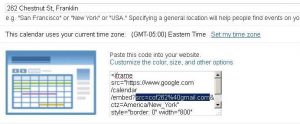
Now enter the street address of the venue in the “Location” box.
If you had to concatenate the name of the venue into one word (for example: CircleOfFriends), split it apart into separate words in the Calendar Name field now (for example: Circle of Friends).
NOTE: There is a bug in the Google code that prevents your calendar name from appearing in the pull down print menu of the combined calendar. To get around this, make a small change to the name of your venue in the “Calendar Name” box. Click the “Save” button. You can either keep the change that you just made or go back into “My calendars” and choose “Settings” again, change the name back to what it was and then click the “Save” button again. For some reason, making a (temporary or permanent) change to the name fixes the problem.
Click the “Save” button to save your changes and to return to the calendar.
Step 6
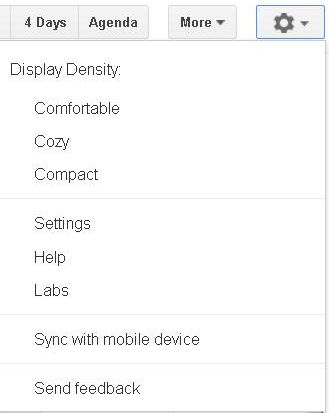
Click on the “Settings” button on the top right corner of the page and choose “Settings” from the drop down menu.
Click the “Calendars” link at the top left of the page.
Toward the bottom of the page, click off the check boxes for “Birthdays” and “Holidays in United States”.
If you want to import calendar data from an old account, then do that now by clicking the “import calendar” link in the middle of the page.
Step 7
Now click on the “General” link at the top of the page.
Under “Events from Gmail”, click off the checkbox for “Add automatically”.
Set “Show events you have declined” to “No”.
Set “Automatically add invitations to my calendar” to “No, only show invitations to which I have responded”.
Click the “Save” button.
Step 8
Now you are ready to start adding shows into the calendar. Refer to the Instructions for Adding Shows to the BACHA Calendar. You should add at least one or two shows to make sure everything is working okay.
Once you have entered at least one show into the calendar, take the Venue Code that you obtained in Step 5, and edit it into the calendar page of the website. Coordinate this with the BACHA website administrator because you will need the user name and password in order to be able to make changes to the website.
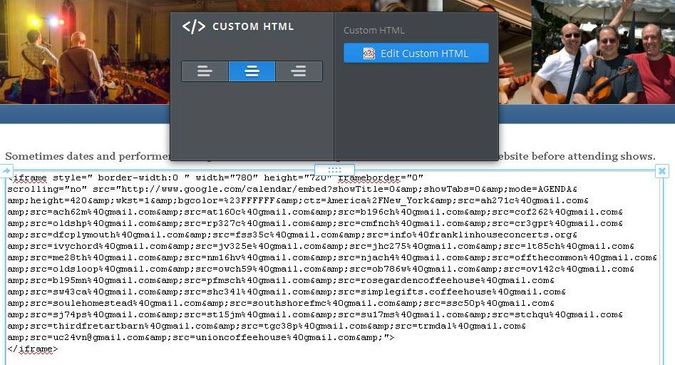
Once you have logged into the backend for the BACHA website, go to the calendar page and double click on the empty space to the right of the calendar. This will bring up the HTML edit window for the combined calendar. Find the spot in the list where you want to insert the new venue (they are listed alphabetically by venue name) and paste in the Venue Code from Step 5. Don’t forget the semicolon at the end. The Venue code for Circle of Friends coffeehouse, for example, is src=cof262%40gmail.com&
Once you have verified that all is working okay and that you can see the new venue and the first show that you entered for them, click the “Publish” button at the top right corner of the screen.
NOTE: You will edit this same page when you have to remove a venue from the calendar.
Step 9
Now you can turn it over to the venue so that they can add the remaining shows. Review the information in the text file, and then send it to the person who will be entering the shows for that venue. Include the link to the Instructions for Adding Shows to the BACHA Calendar in the email.
If they read the instructions, then they should have no problems adding their shows into the calendar. If they don’t read the instructions, then you will have to answer a bunch of unnecessary questions and try to get them to actually sit down and read the instructions before proceeding any further.
Make sure that you keep a copy of the text file. Part of the Calendar Administrator’s job is to keep copies of all of the text files with the account information for all of the venues.
